(With special thanks to Sally and Diana for modelling!)
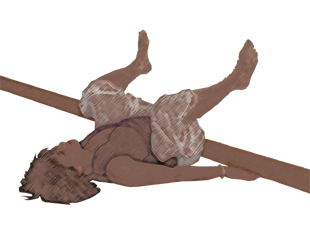
Ever have one of those days where you didn’t want to do anything but collapse? You know you should do some yoga, but your get up and go has got up and went? Your yoga buddy, whom you rely on for moral support, has bailed on you? Where can you go for that support now? Well, your support may be as close as that wall over there! Put on some soothing music, clear a space by your longest wall, grab a watch (preferably with a timer) and a cushion or two, and settle into some wall yin.
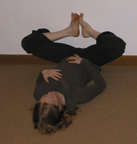
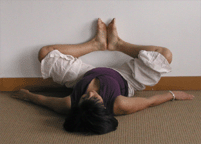
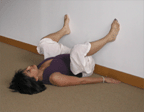
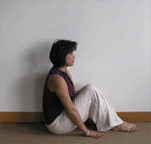 Wall Butterfly – Like all yoga journeys, you can start with a brief meditation, but this time with the wall supporting your feet. The easiest way to get into this position may be to sit sideways against the wall and then swivel: swing your legs up the wall and lie down. Next, try to snuggle your butt to the corner of the wall and the floor. For the Wall Butterfly, bring your feet together and let your heels come as low as they can, and allow the knees to go as wide as they can. Since this is your meditation position, place your hands where you feel most comfortable: either place them over your heart, your belly (or one hand over each), or let your arms fall to the sides. Wait here for as long as your intuition suggests. Breath, allow a few sighs to slip out, and be present.
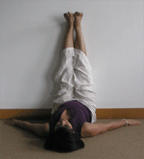
 Wall Caterpillar – from the Wall Butterfly, simply straighten your legs up the wall. If you find that you can’t keep your legs straight and your butt tucked into the corner of the floor and the wall at the same time, it is okay to wiggle a little away from the wall. A nice option here may be to place a cushion under your sacrum. Hold this position for anywhere from 3~10 minutes. It is very restorative and great for people who have been on their feet all day.
 Wall Squat (or Wall Happy Baby!) – now we start to work into the hips. Starting from the legs straight up wall, bend both knees and slide your feet down the wall. Have the feet comfortably apart, which for you may be approximately hip width apart. If you can manage to have the feet and knees wider than hip width apart, the pose gets juicier. Now your butt may have lifted off the floor when you slid your feet down; for some people this is quite alright and they like the hips up a bit. Others may not like this because it puts too much stress into the sacrum. Feel free to slide a bit away from the wall so that your sacrum can be flat on the floor.
The intention here is to start to wake up the hips sockets, so as long as you are feeling something there, you are getting the pose. 3~5 minutes here should be enough. For the last minute or so, you may want to come into the traditional Happy Baby by grabbing your feet or holding the back of your thighs, and pulling your knees to the floor. When you have had enough, straighten the legs up against the wall again and give your self a chance to release any tension from the previous posture. Wiggle, move, do whatever feels organic. Try tantrumasana, which you may have perfected when you were a child: shake everything – let your arms and legs flail in the air!
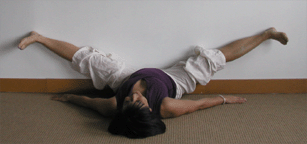 Wall Straddle – You will need a bit of space for this one, especially if you are quite flexible. Start with your legs straight up the wall (or your variation of that) and then simply let gravity draw the legs apart, your feet sliding down the wall. Reach that “Goldilocks'” position where the sensations are just right (see Newsletter #1 for an explanation of the Goldilocks’ Position if this is an unfamiliar term for you). When you want a little more, you can try resting your hands on your inner thighs. No need to pull though: let your muscles relax. Stay here for 3~5 minutes. When you are ready to come out, use your hands to push your legs together, like closing a book. Wiggle and move a bit: remember a bit of yang movement between the yin poses helps to free up stuck energy.
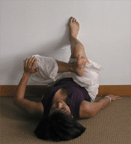
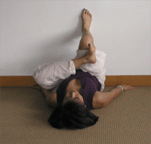
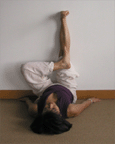 Wall Eye (of the needle) – We will start on the right side, however, if your left hip is the more open hip, feel free to start on the left side first. Start with your legs straight up the wall, and then place your right ankle on your left knee. Now you are upside down so the words above and below can be confusing but ideally we want the ankle just below the knee, which actually means closer to the floor, or on your thigh, but not your shin. Flex the right foot, which helps to support the knee a bit, and then slowly bend the straight leg, sliding the foot down the wall. See if you can get to the place where your foot is at the same height as the knee. This is the position of maximum stress for the hip.
If you need to, feel free to slide your butt away from the wall so that the sacrum can remain flat on the floor. Either way can be okay: you may want to stay there and let your hips be off the floor, or you may choose to move a bit away from the wall until your sacrum is again flat on the floor. One is not better than the other position: just different. Notice the differences in where you feel each variation, and then choose which one you want to do today.
You may want to ease into this in stages: don’t slide your left foot down the wall to quickly. You can also use your right hand pressing into your knee and wing out that knee a few times to loosen up the joint before you hold in stillness. Hold here for 3~5 minutes. We come out of this pose by moving into a twist.
[A note from Lorien in the YinYoga.com Forum on this pose: “The students with really open hips may need a little help to get any sensation in eye of the needle pose. Let’s say the right foot is resting on the left thigh; as I bend my left knee and slide my foot down the wall, my right knee falls into my chest and I feel no sensation around my hips unless I open my right knee toward the wall. I’ve found that if I brace my right elbow on the floor and prop open my right thigh with my hand, I can hold this position without a lot of muscular effort. Some students place a block on their ribcage to prop the thigh, but I don’t like what that does to my breath. Did I mention yet how much I love using the wall???”]
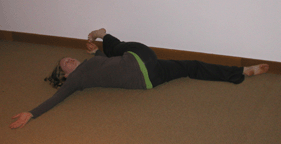
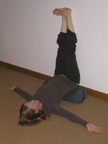
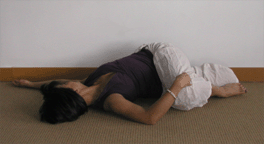 Reclining twist – From the eye of the needle we come into a reclining twist by simply lowering the lower body (the legs and hips) to the floor while keeping the upper body where it is. You may want to spread your arms wide apart to help anchor your shoulders, then drop your right foot and left knee to the left and find a comfortable twist. Having your left foot still touching the wall (ideally the top of your foot is against the wall) will keep your knees closer to your chest, which can make this a deeper twist for many students. Hold here for 3~5 minutes. We come out of this pose by returning our legs up the wall and shaking them out for a bit.
Wall Eye – left side: Do the previous two postures again but on the other side this time. That means, start with your left ankle on your right knee. When done go into the twist.
Reclining Twist – right side: Drop both your left foot and right knee to the right side.
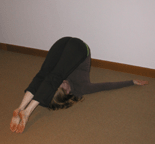
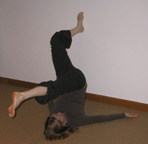
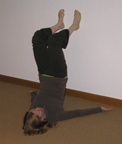 Wall Arch – this posture can be skipped if for any reason you don’t want to invert today. It is a wall version of Shoulder Stand. Remember, folks with high blood pressure, glaucoma, diabetes, women in their moon cycle, folks with neck issues or anyone who just doesn’t want to go upside down today, leave this one out! If you are ready to try it, return your legs straight up the wall again.
Once again slide both feet down the wall, as if you were coming into Wall Squat, but don’t lower the feet too far: 12~18 inches should be enough. Place your hands beside you, palms pressing into the floor and now, press both feet into the wall and lift your hips high off the floor. Come into an arch. Hands stay on the floor. Don’t worry if your hips are not over your shoulders. By pressing into the wall with your legs, instead of using your back muscles or arms, you should find it easy to stay upside down for quite a while. Stay here for a minute before trying the second variation.
The second variation is to allow your right foot to come off the wall and let that leg dangle over your head towards the floor. Keep the left foot on the wall. You may find a point of balance here where you don’t have to leave any pressure in the left foot against the wall. Stay here only if your neck is not complaining. After a minute or so, switch legs.
The final variation, again not for everyone, is to have both legs fall over your head and come into the Snail pose for the last minute or two. Come out of the snail by returning one leg at a time to the arch, and then lower down slowly. You may want to shake out your legs or do a mild spinal lift here to relax your spine.
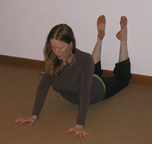
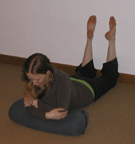
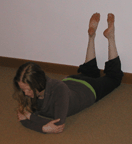 Wall Sphinx – We finish in Sphinx pose but with our feet up against the wall. To come into this just roll over onto your belly. Bend your knees and scoot yourself back to the wall so that your knees are now at the corner between the wall and the floor. Your feet will be up the wall. Clasp your elbows with the opposite hands. For a few minutes allow the back to soak into this shape, and if you want a bit more compression or sensation in the lumbar spine, feel free to rest your elbows onto a cushion. Stay for 3~5 minutes. The deepest version of this pose is to extend the arms into Wall Seal, but this is pretty deep so don’t let your ego tell your body what you should do.
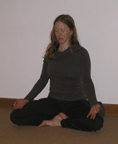 Shavasana & Closing meditation – Now relax! Since this whole sequence has been rather relaxing already, you may choose to skip a reclining Shavasana and just sit quietly for several minutes.
Note: The order to the Wall Yin sequence was done for specific reasons, but feel free to experiment with your own arrangements. We don’t often have the room to do another pose that I really like doing …it is a variation of the reclining twist against the wall. If you have the space you may want to try this too: lie down so the wall is to your right and parallel to you, and just a couple of feet away, draw your left knee into the chest; use your right hand to hold the knee in, opening your left arm to the left for anchoring; draw the left leg across the body and roll onto your right hip, keeping both shoulders on or close to the floor; now … try to straighten the left leg and rest the foot (or the back of the heel!) against the wall. As you open up with time, slide your torso closer to the wall. Hopefully you can picture what I mean – and if not, check out the photo above. It is the second version shown of the Wall Twist. Don’t forget to do both sides.
Here is a final Wall thought, again from Lorien. “I love working with the wall, because it really helps people with back issues. When I am teaching a class against the wall and there is limited space, I try this: have every other student take the straddle position, while the ones in between take the butterfly position… hold for the length of the pose, then have them switch. It works great!”
———————–
Other cool Yin Yoga sequences can be found in the YinYoga.com Forum. Feel free to add your own unique and favourite sequences!
(Back to Yin Yoga Flows)
